Choosing the right wireless microphone frequency for event venues is crucial for a successful event. The selection process involves understanding different frequency bands (UHF, VHF), their respective ranges and susceptibility to interference, and navigating legal licensing requirements. Careful consideration of potential interference sources within the venue—from other wireless devices to the venue’s physical structure—is paramount. This involves conducting thorough site surveys and employing effective frequency coordination techniques, especially in larger venues with multiple microphones.
Ultimately, the goal is crystal-clear audio without interruptions.
This guide explores the intricacies of wireless microphone frequency selection, providing a practical framework for navigating the technical and legal aspects. We will cover identifying potential interference, selecting appropriate frequencies for various venue types, and implementing best practices for frequency management. By following these steps, event organizers can ensure seamless audio transmission and a professionally executed event.
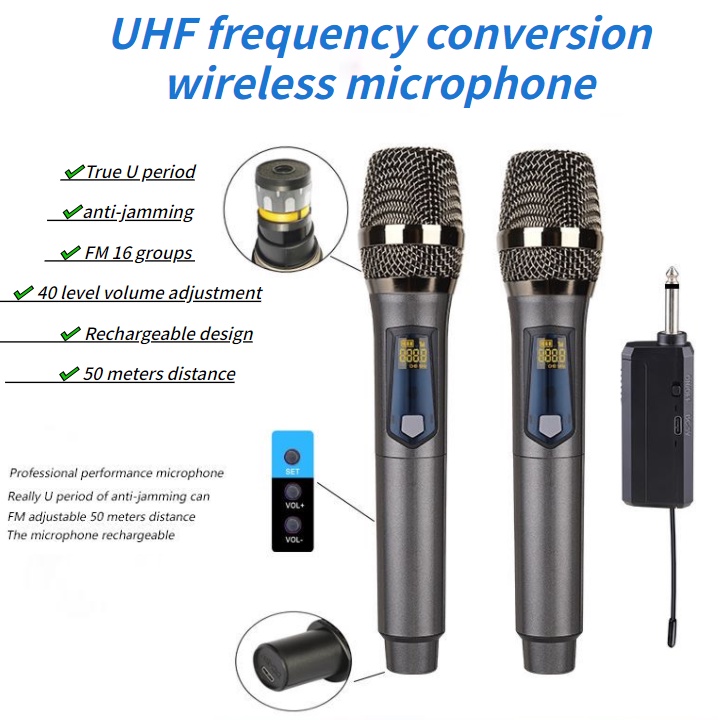
Understanding Wireless Microphone Frequency Bands
Choosing the correct wireless microphone frequency band is crucial for a successful event. The wrong choice can lead to interference, dropouts, and a generally poor audio experience. Understanding the characteristics of different frequency bands is therefore essential for sound professionals. This section will explore the key differences between common wireless microphone frequency bands, highlighting their advantages and disadvantages.
Wireless Microphone Frequency Bands: UHF and VHF, Choosing the right wireless microphone frequency for event venues
Wireless microphones operate within specific radio frequency bands. Two primary bands are commonly used: Very High Frequency (VHF) and Ultra High Frequency (UHF). These bands differ significantly in their properties, impacting range, susceptibility to interference, and licensing requirements.
VHF Frequency Band Characteristics
VHF frequencies, typically ranging from 30 MHz to 300 MHz, were historically more common for wireless microphones. However, they are increasingly less favored due to their limitations. VHF signals are more susceptible to interference from other sources, including radio broadcasts, television signals, and even some weather phenomena. This susceptibility reduces their effective range, especially in densely populated areas or environments with numerous electronic devices.
While VHF systems are often less expensive, their limitations in terms of reliability and range outweigh the cost savings in most professional contexts.
UHF Frequency Band Characteristics
UHF frequencies, typically ranging from 300 MHz to 3 GHz, are now the dominant choice for professional wireless microphone systems. They offer several advantages over VHF. UHF signals are less susceptible to interference from other sources due to their higher frequency. This results in a greater operating range and more reliable performance, even in challenging environments. The wider bandwidth available in UHF also allows for more channels to operate simultaneously without interference, accommodating larger events with numerous microphones.
However, UHF systems generally require licensing in some regions, adding a layer of complexity and cost.
Comparison of VHF and UHF Frequency Bands
| Frequency Band | Typical Operating Range | Interference Susceptibility | Licensing Requirements |
|---|---|---|---|
| VHF | Limited, susceptible to interference from other sources; typically shorter range than UHF | High; susceptible to interference from radio broadcasts, television signals, and other electronic devices | Generally less stringent, but varies by region and frequency |
| UHF | Generally greater range and more reliable than VHF; can be extended with antennas | Lower; less susceptible to interference than VHF | Often requires licensing in some countries and frequency bands; specific regulations vary widely |
Identifying Potential Interference Sources in Event Venues
Successfully deploying wireless microphones requires a proactive approach to identifying and mitigating potential interference. Understanding the common sources of interference and how venue characteristics impact signal quality is crucial for ensuring clear audio throughout your event. Failing to do so can lead to dropouts, static, and overall poor audio quality, significantly impacting the event’s success.Wireless microphone signals can be easily disrupted by a variety of electronic devices and environmental factors.
This section will detail common interference sources and provide practical steps to conduct a pre-event site survey to minimize these issues.
Common Interference Sources
Numerous electronic devices operate on frequencies that overlap with those used by wireless microphones. These devices can create significant interference, leading to signal degradation or complete loss. Understanding these sources and their potential impact is essential for selecting appropriate frequencies and optimizing microphone placement.
- Other Wireless Devices: Wireless headsets, in-ear monitors, and other wireless microphones operating on the same or adjacent frequencies are major culprits. The more wireless devices operating in close proximity, the higher the likelihood of interference.
- Wi-Fi Networks: The 2.4 GHz band used by many Wi-Fi networks overlaps with some wireless microphone frequencies, leading to potential interference. The density of Wi-Fi networks in a venue (particularly those with many attendees using their own devices) can significantly impact wireless microphone performance. A large conference hall with hundreds of attendees using their laptops and smartphones will have much more interference than a smaller, less technologically-saturated space.
- Microwave Ovens: Microwave ovens operate on frequencies that can severely interfere with wireless microphones. Even a microwave oven in a nearby kitchen or service area can cause significant signal disruption if the microphone and oven are on simultaneously.
- Bluetooth Devices: Similar to Wi-Fi, Bluetooth devices operate on frequencies that can cause interference, especially when numerous devices are in use.
Venue Material and Structural Effects
The physical characteristics of an event venue can significantly affect wireless microphone signal strength and clarity. Different materials absorb or reflect radio waves in varying degrees, impacting signal propagation.Building materials like metal, concrete, and glass can significantly attenuate (weaken) the signal. Metal structures, in particular, can act as barriers or even reflectors, causing signal loss or creating “dead zones” with weak or no reception.
Conversely, large open spaces with minimal obstructions generally provide better signal propagation. The presence of numerous reflective surfaces can also lead to multipath interference, where the signal arrives at the receiver via multiple paths, causing echoes and distortion.For example, a large concert hall with many reflective surfaces will present more challenges in achieving consistent signal strength compared to a smaller, less reflective room.
A venue with extensive metal structures, such as a warehouse or industrial space, will likely require more careful frequency planning and possibly the use of directional antennas to compensate for signal loss.
Conducting a Site Survey
A thorough site survey is crucial to identify potential interference sources before an event. This involves systematically assessing the venue for sources of interference and testing the wireless microphone system in various locations.
- Identify Potential Interference Sources: Walk through the venue, noting the location of all potential interference sources, including Wi-Fi routers, microwave ovens, other wireless devices, and significant metal structures. Make a note of their proximity to the planned microphone locations.
- Test Microphone Performance: Using the wireless microphone system, test signal strength and clarity at various locations within the venue. Pay close attention to areas where signal strength is weak or where interference is noticeable. Consider using a field strength meter to quantitatively assess signal strength at different locations.
- Adjust Microphone Placement and Antenna Orientation: Based on the test results, adjust microphone placement and antenna orientation to optimize signal strength and minimize interference. Consider using directional antennas to focus the signal and reduce interference from specific sources.
- Document Findings: Create a detailed report documenting the identified interference sources, test results, and any adjustments made to the microphone system. This report will be valuable for future events at the same venue.
Selecting the Right Frequency for Specific Venue Types
Choosing the correct wireless microphone frequency is crucial for a successful event, and this selection process is heavily influenced by the venue’s size, construction, and potential sources of interference. Different environments present unique challenges, requiring tailored frequency selection strategies to ensure clear audio and avoid dropouts.Frequency selection strategies vary significantly depending on the venue type. Small, enclosed spaces generally present fewer challenges than large, open areas or those with complex infrastructure.
Frequency Selection for Small Conference Rooms
Small conference rooms typically offer a more controlled RF environment. The smaller size limits the propagation distance of radio waves, reducing the likelihood of interference from external sources. A single, carefully chosen frequency within a less congested band, such as the UHF range, often suffices. Detailed site surveys are usually unnecessary; however, checking for potential interference from nearby electronic devices (computers, projectors) is advisable.
A simple test transmission before the event can confirm frequency suitability.
Frequency Selection for Large Auditoriums
Large auditoriums present a more complex RF environment. The larger volume and potentially numerous metal structures (lighting rigs, seating) can cause signal reflections and attenuation, leading to dead zones or increased interference susceptibility. Multiple frequencies might be necessary to cover the entire space adequately, and careful coordination is essential to prevent interference between microphones. A pre-event site survey using professional RF spectrum analysis equipment is highly recommended to identify available frequencies and potential interference sources.
Frequency Selection for Outdoor Spaces
Outdoor events pose the greatest challenge to wireless microphone frequency selection. The open environment allows for greater signal propagation, increasing the likelihood of interference from external sources like other wireless devices, radio towers, and even weather phenomena. Wideband frequencies, and potentially a larger number of channels, might be required to overcome the challenges. A comprehensive site survey is essential, potentially requiring multiple surveys at different times of day to account for variations in interference levels.
Selecting the appropriate wireless microphone frequency is crucial for avoiding interference in event venues; factors like building materials and other electronic devices significantly impact signal quality. If you’re on a budget and need a reliable option for speeches, check out this guide for the best wireless microphone for speeches under 100 dollars to see if it meets your frequency needs.
Ultimately, careful frequency planning ensures a smooth, interference-free audio experience for your event.
Frequency coordination techniques, such as using different frequency bands for different microphone types or employing sophisticated antenna systems, are often necessary.
Workflow for Choosing Appropriate Frequencies
A structured workflow significantly improves the chances of selecting suitable wireless microphone frequencies. This workflow involves several key steps:
1. Venue Assessment
Document the venue’s size, layout, construction materials, and potential interference sources (Wi-Fi routers, security systems, etc.).
2. Preliminary Frequency Selection
Based on the venue assessment, select a preliminary frequency or range of frequencies using available frequency coordination software or databases.
3. Site Survey
Conduct a site survey using RF spectrum analysis equipment to identify available frequencies and potential interference sources. This step is crucial for larger venues or those with complex RF environments.
4. Frequency Coordination
Based on the site survey results, coordinate the frequencies for all wireless microphones to avoid interference.
5. Testing
Test the chosen frequencies in the venue before the event to ensure clear audio and reliable transmission.
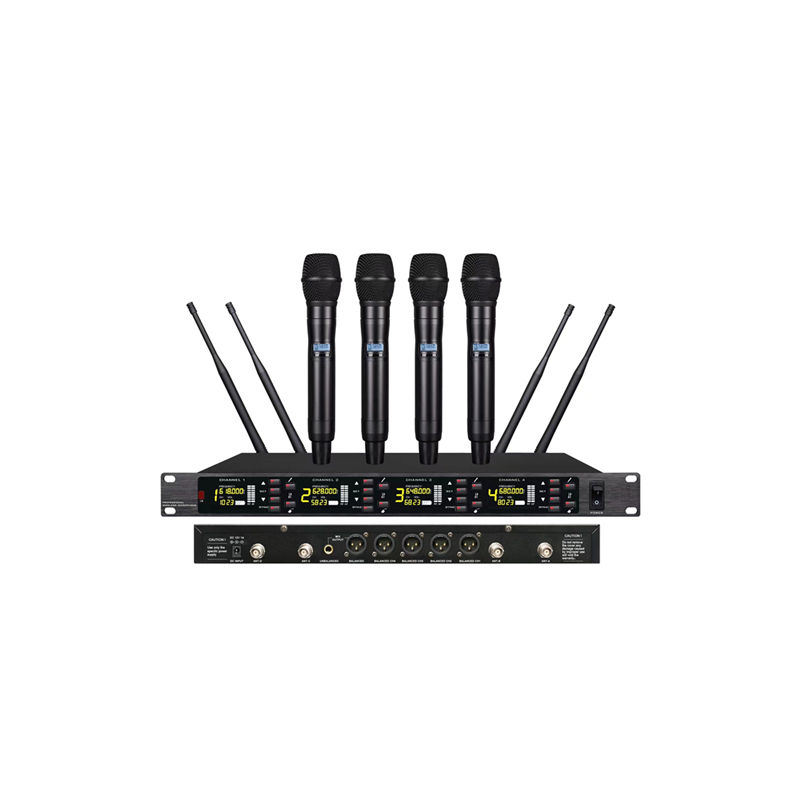
Frequency Coordination Techniques for Multi-Microphone Setups
Effective frequency coordination is vital for multi-microphone setups. Several techniques can be employed:* Frequency Diversity: Utilizing frequencies from different frequency bands for different microphones minimizes the risk of mutual interference. For example, one microphone might operate in the 500-600MHz range, while another uses 700-800MHz.
Channel Spacing
Maintain sufficient channel spacing between microphones to prevent interference. The exact spacing required depends on the specific equipment and RF environment, but it is usually specified by the manufacturer.
Antenna Placement
Strategic antenna placement can improve signal coverage and reduce interference. Directional antennas, for instance, can focus the signal, minimizing spillover into other frequencies.
Intermodulation Avoidance
Carefully select frequencies to avoid intermodulation distortion, a form of interference caused by the mixing of signals from different transmitters.
Legal and Regulatory Considerations for Wireless Microphone Frequencies

Operating wireless microphones legally and responsibly is crucial for any event. Ignoring regulations can lead to significant fines and disruption of your event. Understanding the legal framework surrounding wireless microphone frequencies is paramount to ensuring a smooth and compliant operation. This section will Artikel the key legal requirements and potential consequences of non-compliance.Using wireless microphones often involves navigating a complex landscape of regulations that vary considerably depending on your geographical location.
These regulations are designed to manage the radio frequency spectrum, preventing interference and ensuring fair access for all users. Failure to adhere to these regulations can result in significant penalties.
Frequency Licensing Requirements
The need for licensing depends heavily on the specific frequency band used and the country or region in which the event is taking place. Some countries operate a licensing system for all wireless microphone frequencies, while others may only require licenses for certain bands or power levels. For instance, in the United States, some frequencies are license-exempt, meaning no license is required, while others fall under the purview of the Federal Communications Commission (FCC) and require a license.
In the European Union, similar regulations exist, managed by individual member states, often following the guidelines set by the European Conference of Postal and Telecommunications Administrations (CEPT). Before operating any wireless microphone system, it is vital to check the relevant regulatory body’s website for specific requirements. Failing to do so could result in legal repercussions.
Penalties for Non-Compliance
The penalties for operating wireless microphones illegally can range from warnings and fines to equipment seizure. The severity of the penalty often depends on the nature of the violation, the frequency band used, and the jurisdiction. In the US, for example, the FCC can impose significant fines for unlicensed operation or operation outside designated frequency bands. These fines can reach thousands of dollars per violation.
Similar penalties exist in other countries, with some jurisdictions even imposing criminal charges in severe cases. It’s crucial to remember that the cost of obtaining a license is far less than the potential penalties for operating without one.
Resources for Obtaining Wireless Microphone Frequency Licenses
Securing the necessary licenses for your wireless microphone operation is a straightforward process if approached systematically. The first step involves identifying the correct regulatory authority in your region. This is usually a national telecommunications agency or a similar body.
- United States: Federal Communications Commission (FCC)
-Their website provides detailed information on licensing procedures and applicable regulations. - European Union: Individual member states have their own regulatory bodies. The CEPT website offers general guidance and links to national authorities.
- United Kingdom: Ofcom is the regulatory body responsible for licensing and managing the radio spectrum.
- Canada: Innovation, Science and Economic Development Canada (ISED) handles licensing and regulations for wireless devices.
These websites typically provide online application forms, fee schedules, and contact information for assistance. Thoroughly reviewing the relevant regulations and completing the application accurately is vital to ensure a swift and successful licensing process. Contacting the regulatory body directly if you have any questions is always advisable.
Troubleshooting Wireless Microphone Frequency Issues
Successfully deploying wireless microphones requires careful planning and execution. However, even with meticulous preparation, issues can arise. Understanding common problems and effective troubleshooting techniques is crucial for ensuring a smooth and successful event. This section will address common wireless microphone frequency problems and provide practical solutions.
Wireless microphone systems, while convenient, are susceptible to a range of issues that can disrupt audio quality and transmission. These problems typically manifest as dropouts (intermittent loss of signal), static (hissing or crackling sounds), and interference (overlapping signals from other devices). The root causes are varied and can range from simple configuration errors to more complex environmental factors.
Common Wireless Microphone Frequency Problems and Their Causes
Several factors can contribute to poor wireless microphone performance. Identifying the source of the problem is the first step towards a solution. Understanding these causes is critical for effective troubleshooting.
- Dropouts: These are characterized by intermittent signal loss, often resulting in breaks in audio transmission. Common causes include weak signal strength (due to distance from receiver or obstacles), interference from other wireless devices operating on the same or adjacent frequencies, and poor antenna placement.
- Static: A persistent hissing or crackling sound indicates noise interference. Sources can include nearby electronic devices (computers, lighting systems, cell phones), faulty cabling, or even atmospheric conditions.
- Interference: This occurs when signals from multiple wireless devices overlap, causing audio distortion or complete signal loss. This is often due to multiple devices operating on the same frequency channel, or channels that are too close together.
Troubleshooting Techniques for Resolving Wireless Microphone Frequency Problems
Effective troubleshooting involves a systematic approach. The following techniques can help isolate and resolve many common wireless microphone frequency issues.
- Check Signal Strength and Distance: Ensure the transmitter and receiver are within the specified operating range. Obstacles between them can significantly weaken the signal. Consider moving the receiver closer to the transmitter or relocating the transmitter to a more open area.
- Adjust Frequency Settings: If interference is suspected, try changing the wireless microphone’s frequency channel. Consult the device’s manual for instructions on how to scan for available channels and select a less congested one. Many modern systems have automated scanning features.
- Optimize Antenna Placement: The placement of the antennas on both the transmitter and receiver significantly impacts signal strength and quality. Experiment with different antenna orientations (vertical or horizontal) to find the optimal position. Ensure antennas are not obstructed by metal objects or other electronic devices.
- Identify and Eliminate Interference Sources: Systematically turn off nearby electronic devices one by one to identify potential sources of interference. This may involve temporarily disabling non-essential equipment like Wi-Fi routers, lighting dimmers, or other wireless systems.
- Check Cabling and Connections: Inspect all cables for damage or loose connections. A faulty cable can introduce noise and significantly degrade signal quality.
Flowchart for Diagnosing and Fixing Wireless Microphone Frequency Issues
A visual guide can streamline the troubleshooting process. The following flowchart Artikels a logical sequence of steps to diagnose and resolve common wireless microphone frequency problems.
[Diagram would be inserted here. The diagram would show a flowchart with the following elements: Start -> Check Signal Strength and Distance -> Is signal weak? (Yes/No) -> If Yes: Optimize Antenna Placement/Relocate Transmitter/Receiver -> If No: Check for Interference -> Is there interference? (Yes/No) -> If Yes: Adjust Frequency Settings/Identify and Eliminate Interference Sources -> If No: Check Cabling and Connections -> Is there a cabling issue? (Yes/No) -> If Yes: Repair/Replace Cables -> If No: Problem Solved -> End]
This flowchart provides a visual representation of the troubleshooting process, allowing for a systematic approach to identifying and resolving the issue.
Best Practices for Wireless Microphone Frequency Management
Effective wireless microphone frequency management is crucial for ensuring a seamless and interference-free audio experience during any event. Poor frequency planning can lead to dropouts, audio artifacts, and ultimately, a compromised performance. By implementing best practices, event professionals can minimize these risks and deliver high-quality audio.Proper antenna placement, frequency coordination, and judicious equipment selection are fundamental to preventing interference.
Understanding the principles behind these practices will greatly improve the reliability of your wireless microphone system.
Antenna Placement for Optimal Signal Strength and Minimized Interference
Strategic antenna placement significantly impacts signal strength and interference susceptibility. Ideally, antennas should be positioned at a height that provides clear line-of-sight to the receiving microphones, minimizing obstacles like walls, furniture, and people. For larger venues, multiple antennas strategically located may be necessary to ensure consistent coverage. Furthermore, placing antennas away from potential interference sources, such as metal objects, power lines, and other wireless devices, is essential.
Consider using directional antennas to focus the signal and reduce interference from unwanted sources. A well-placed antenna can dramatically improve signal quality and reduce the chance of interference. For example, in a large auditorium, placing antennas at the back of the stage and at the mixing console could provide optimal coverage and reduce the chances of signal dropouts.
Frequency Coordination with Other Wireless Devices
Coordinating frequencies with other wireless devices operating at the event is critical. Many devices, including Wi-Fi routers, cellular phones, and other wireless microphones, operate within the same frequency spectrum. Before the event, scan the frequency spectrum to identify active channels and avoid conflicts. Wireless frequency coordination software can be invaluable in this process. This software analyzes the spectrum and identifies available frequencies with minimal interference.
A detailed frequency plan, allocating specific frequencies to each microphone and other wireless devices, should be created and followed meticulously. For example, if you are using five wireless microphones, you might assign them frequencies spaced far enough apart to avoid interference, while also ensuring that these frequencies don’t overlap with the frequencies used by the venue’s Wi-Fi network or other wireless equipment.
Checklist for Successful Wireless Microphone Frequency Management
A comprehensive checklist ensures successful wireless microphone frequency management throughout the event setup and operation. This checklist helps streamline the process and reduces the likelihood of overlooking crucial steps.
- Pre-Event Planning: Conduct a site survey to identify potential interference sources and assess the venue’s layout.
- Frequency Scanning: Use a spectrum analyzer to identify available frequencies and avoid conflicts with other wireless devices.
- Frequency Coordination: Develop a detailed frequency plan, allocating specific frequencies to each wireless microphone and other wireless devices.
- Antenna Placement: Strategically position antennas to maximize signal strength and minimize interference.
- Equipment Testing: Thoroughly test the wireless microphone system before the event to ensure proper functionality and identify potential issues.
- On-Site Monitoring: Monitor the wireless microphone system during the event to detect and address any interference issues promptly.
- Contingency Planning: Have backup frequencies and equipment readily available in case of interference or equipment failure.
Illustrating Frequency Allocation and Interference
Imagine a large conference hall hosting a multi-speaker event. Ten wireless microphones are needed for simultaneous use on stage, each requiring its own dedicated frequency. Careful frequency allocation is crucial to prevent audio bleed and ensure clear, uninterrupted sound for the audience.Effective frequency management in this scenario involves a systematic approach. First, a site survey is conducted to identify potential sources of interference, such as Wi-Fi routers, other wireless devices, and even fluorescent lights.
This survey informs the choice of frequencies. Then, using a professional wireless frequency coordination system, frequencies are assigned to each microphone, selecting channels that are sufficiently separated to minimize interference. The system might suggest frequencies based on its analysis of the identified interference sources and the number of microphones in use. It would ideally prioritize frequencies less prone to interference and then automatically checks for overlaps.
In a busy RF environment, the system would help avoid adjacent channel interference, which is the interference that occurs when two adjacent channels are too close to each other, causing bleed over.
Frequency Allocation Strategies
The chosen frequencies are documented and assigned to specific microphones. This ensures that each microphone operates on a unique channel. In this case, it is critical that the frequency plan is meticulously adhered to by the technicians operating the equipment during setup and throughout the event. This will avoid any unplanned switching or adjustment that could result in interference.
For example, channels might be allocated in a sequential manner, with sufficient spacing to accommodate potential variations or drifts.
Mitigating Interference Problems
Despite careful planning, interference can still occur. For instance, a nearby amateur radio operator might be transmitting on a frequency close to one used by a microphone, causing a buzz or static. Troubleshooting involves identifying the source of interference – a spectrum analyzer would help pinpoint the offending frequency. Once identified, solutions might include switching the microphone to a different, less congested frequency (if available), adjusting the microphone’s gain, or requesting the interfering device to temporarily cease operation or change its frequency.
As a last resort, the problematic microphone might need to be temporarily switched to a wired connection, though this reduces the mobility and convenience of wireless microphones.
Real-World Example
A large music festival in a city center experienced significant interference from nearby cellular towers and other wireless communication systems. The frequency coordinator, utilizing a sophisticated frequency coordination software, initially allocated frequencies based on a pre-event site survey. However, during the event, interference arose on several channels. Using a spectrum analyzer, the coordinator identified the interfering sources and re-allocated frequencies for the affected microphones, resolving the issues and ensuring uninterrupted performances.
The flexibility of the software and the skill of the technician were key in addressing these unexpected problems.
Last Word: Choosing The Right Wireless Microphone Frequency For Event Venues
Successfully navigating the complexities of wireless microphone frequency selection significantly impacts event success. By understanding frequency bands, potential interference sources, and legal regulations, event organizers can proactively mitigate technical issues and ensure clear, uninterrupted audio. Through careful planning, site surveys, and diligent frequency coordination, the potential for interference is minimized, resulting in a professional and enjoyable experience for both presenters and attendees.
Remember that proactive planning and preparation are key to a smooth and successful event.
Essential FAQs
What is the difference between UHF and VHF frequencies?
UHF (Ultra High Frequency) offers a wider range and is less susceptible to interference than VHF (Very High Frequency), making it generally preferred for professional applications. However, UHF frequencies often require licensing.
How can I minimize interference from Wi-Fi networks?
Coordinate your wireless microphone frequencies with your venue’s IT department to avoid overlapping channels. Using directional antennas and selecting frequencies further away from Wi-Fi bands can also help.
What should I do if I experience audio dropouts during an event?
Check antenna placement, ensure proper power supply, investigate potential interference sources (other wireless devices), and consider adjusting the microphone’s frequency to a less congested channel.
Are there any free frequency scanning apps available?
Several apps are available for both Android and iOS devices that can help scan for available frequencies and identify potential interference. However, the accuracy may vary, and a professional site survey is often recommended for critical events.