How to clean headphone jacks and ports thoroughly is a crucial aspect of maintaining audio equipment. Neglecting these essential components can lead to poor audio quality, device malfunctions, and even permanent damage. Regular cleaning, on the other hand, ensures optimal performance and prolongs the lifespan of your devices. This guide covers cleaning methods for various types of headphone jacks, from the ubiquitous 3.5mm to more modern USB-C and Lightning connectors.
Proper cleaning techniques, coupled with preventative measures, can help you avoid future issues.
This comprehensive guide provides detailed information on the tools, methods, and precautions necessary for effectively cleaning headphone jacks and ports. We’ll cover everything from selecting the right cleaning supplies to executing the cleaning procedure for different jack types, ensuring a safe and thorough cleaning experience.
Introduction to Headphone Jack and Port Cleaning
Maintaining the cleanliness of headphone jacks and ports is crucial for optimal audio performance and extended lifespan of your devices. Neglecting these essential components can lead to a cascade of problems, from intermittent audio issues to complete malfunctions. Regular cleaning, on the other hand, ensures seamless audio transmission and prevents costly repairs. This proactive approach significantly enhances the longevity and functionality of your devices.Proper cleaning prevents the buildup of dust, debris, and accumulated earwax, which can cause signal interference and damage the delicate internal components.
The accumulation of such contaminants can lead to a deterioration of sound quality, resulting in static, crackling, or muffled audio. Moreover, a clogged headphone jack or port can lead to connectivity issues, hindering the ability of the device to recognize and correctly transmit audio signals. These problems can be frustrating and time-consuming to diagnose and resolve. This guide will detail the effective cleaning procedures for various headphone jack types.
Different Types of Headphone Jacks and Ports
Headphone jacks and ports come in various configurations, each requiring specific cleaning methods. The most common types include 3.5mm, USB-C, and Lightning connectors. Understanding these distinctions is crucial for effective cleaning and avoiding damage.
Comparison of Cleaning Methods for Different Jack Types
| Jack Type | Cleaning Method | Tools Needed | Precautions |
|---|---|---|---|
| 3.5mm | Gently use a compressed air can to blow out any dust and debris. If necessary, use a very soft, lint-free cloth or cotton swab dipped in isopropyl alcohol (70% or higher) to carefully remove stubborn residues. Avoid using harsh chemicals or abrasive materials. | Compressed air can, lint-free cloth, cotton swab, isopropyl alcohol (70% or higher). | Do not insert anything into the jack forcefully. Avoid getting isopropyl alcohol into the audio circuit components. |
| USB-C | Use a compressed air can to remove loose dust and debris. A soft-bristled brush can be used to dislodge larger particles, taking care not to damage the port’s internal components. For stubborn residues, a very small amount of isopropyl alcohol (70% or higher) applied to a soft cotton swab can be effective. Do not use any abrasive tools. | Compressed air can, soft-bristled brush, cotton swab, isopropyl alcohol (70% or higher). | Avoid excessive force or pressure. Ensure the isopropyl alcohol does not come into contact with the USB connector’s electronic components. |
| Lightning | Use a compressed air can to remove loose dust and debris. Use a soft-bristled brush to carefully remove any accumulated particles. Avoid using anything abrasive or overly forceful. For stubborn residues, a very small amount of isopropyl alcohol (70% or higher) on a cotton swab can be employed, but use extreme caution and avoid contact with the port’s electronic components. | Compressed air can, soft-bristled brush, cotton swab, isopropyl alcohol (70% or higher). | Avoid excessive force or pressure. Ensure the isopropyl alcohol does not come into contact with the Lightning connector’s electronic components. |
Gathering Necessary Supplies

Proper headphone jack and port cleaning requires a strategic approach, using the right tools and materials to avoid damaging delicate components. This section Artikels the essential supplies needed for a thorough, yet safe, cleaning process. A well-prepared toolkit ensures a more effective and less frustrating cleaning experience.
Essential Tools and Materials
A comprehensive cleaning kit should include several items, each designed for a specific function. The selection of materials is crucial to ensure effective cleaning without risk of damage.
- Soft-bristled Brush: A small, soft-bristled brush, such as a toothbrush or a specialized electronics brush, is ideal for removing loose debris from the headphone jack and port. The brush’s bristles should be gentle enough to avoid scratching the delicate metal parts of the port. Use the brush to gently sweep away dust, dirt, and other particles lodged within the jack’s crevices.
Avoid using a brush with stiff bristles, as these could potentially damage the jack’s interior.
- Cotton Swabs (Q-tips): High-quality cotton swabs, preferably with a thin, tapered tip, are effective for reaching into tight areas. Choose swabs with a non-abrasive tip, such as those designed for electronics cleaning, to minimize scratching. Use the swabs to carefully remove any remaining debris or residue that may be stuck to the port’s inner walls. Ensure the swabs are dampened with the cleaning solution to effectively lift the debris.
- Isopropyl Alcohol (70%): A 70% isopropyl alcohol solution is a safe and effective cleaning solution for headphone jacks and ports. This concentration is potent enough to dissolve many types of debris while remaining gentle on the metal and plastic components. Avoid using higher concentrations of alcohol, as these can potentially damage the components.
- Small, Non-abrasive Cleaning Cloth: A small, lint-free cleaning cloth is crucial for drying the headphone jack and port after cleaning. A microfiber cloth is a great option as it is capable of absorbing liquids effectively without leaving behind any lint or fibers. Gently wipe the area clean, ensuring all traces of moisture are removed to prevent corrosion.
- Tweezers (Optional): Fine-tipped tweezers can be helpful for removing stubborn particles or larger pieces of debris that are difficult to reach with a brush or swab. These are often useful for removing pieces of lint or dried earwax.
Proper Usage of Supplies
The correct application of each cleaning tool and material is essential for achieving a successful cleaning without causing harm. Follow these steps to ensure the process is carried out effectively.
- Preparation: Turn off the device and disconnect any cables to ensure safety.
- Cleaning Solution Application: Dip the cotton swab or brush into the 70% isopropyl alcohol solution. Ensure the solution is not excessive; a small amount is sufficient for cleaning.
- Gentle Cleaning: Carefully use the cotton swab or brush to gently clean the interior of the headphone jack or port, moving in a circular or back-and-forth motion. Focus on the crevices and edges where debris tends to accumulate. Avoid pressing too hard, as this could damage the components.
- Drying: Use the lint-free cleaning cloth to carefully dry the headphone jack or port, removing any remaining moisture.
- Final Check: Inspect the cleaned area to ensure that all debris has been removed.
Safe Cleaning Procedures
Proper cleaning of headphone jacks and ports is crucial to maintain their functionality and prevent damage. Following safe procedures is paramount to avoiding potential hazards and ensuring the longevity of your audio equipment. Ignoring these precautions can lead to costly repairs or even irreversible damage.Safe cleaning practices prioritize the well-being of your device and its components. These procedures Artikel steps to minimize risks and maximize the effectiveness of your cleaning efforts, guaranteeing a clean and operational headphone port or jack.
Safety Precautions for Cleaning
Adhering to safety precautions is essential for preventing electrical shock and damage to the headphone jack or port. These precautions are fundamental to ensuring a safe and effective cleaning process.
- Disconnect the Device: Before beginning any cleaning process, disconnect the device from its power source. This crucial step prevents electrical shock, a serious risk when working with any electrical component.
- Avoid Harsh Chemicals: Using abrasive cleaners or harsh chemicals can damage the delicate components within the headphone jack or port. Employing gentle, non-abrasive cleaning solutions is critical to preventing harm to the internal mechanisms.
- Use Gentle Pressure: Applying excessive force when cleaning can damage the internal wiring and contacts. Employing a gentle touch is vital to prevent potential damage. For example, using a soft-bristled brush, rather than a hard-bristled brush, is a crucial step in preventing scratches and other damage.
- Do Not Submerge: Avoid submerging the device or its components in any cleaning solution. This precaution is critical to prevent damage to sensitive electronic components and ensure their functionality. The internal workings are delicate and not designed for prolonged immersion.
- Proper Use of Cleaning Tools: Employing the appropriate cleaning tools is key to effectively and safely cleaning headphone jacks and ports. Use specialized tools for these tasks, such as soft-bristled brushes, compressed air, or cotton swabs, rather than tools that may damage the sensitive components. For example, a toothpick could easily scratch or damage the interior of the port, rendering it unusable.
Potential Risks of Improper Cleaning
Improper cleaning methods can lead to a variety of negative consequences for your device. Recognizing these risks helps emphasize the importance of adhering to the Artikeld safety procedures.
- Electrical Shock: Working with electrical components without disconnecting the device from the power source poses a significant risk of electrical shock. This hazard can lead to serious injury or damage to the device itself.
- Damage to Internal Components: Using abrasive cleaners or excessive force can damage the delicate internal wiring and contacts of the headphone jack or port. This damage can result in malfunctioning or broken components, necessitating costly repairs.
- Corrosion: Harsh chemicals or moisture can cause corrosion within the headphone jack or port. Corrosion can result in a complete failure of the component, rendering it unusable.
- Short Circuits: Improper cleaning methods can lead to short circuits in the internal components. A short circuit can cause permanent damage to the device and possibly create a fire hazard.
Importance of Disconnecting the Device
Disconnecting the device before cleaning is a critical safety step. This precaution is essential for avoiding any potential harm or damage.
Keeping your headphone jacks and ports clean is crucial for optimal audio performance. Using a soft-bristled brush or a cotton swab dampened with isopropyl alcohol can effectively remove dust and debris. Proper storage is just as important, and choosing the right case, like those available in best headphone storage solutions for travel , can prevent damage and keep them protected.
This careful preventative maintenance will ensure your headphones last longer and sound their best.
Disconnecting the device before cleaning is paramount to preventing electrical shock and damage to the device.
Disconnecting the device safeguards against any possibility of electrical shock and protects the sensitive components from harm. Failure to disconnect the device poses a serious risk to both the user and the device.
Cleaning Methods for Different Headphone Jacks
Proper headphone jack and port cleaning is crucial for maintaining audio quality and preventing damage. Neglecting these crucial components can lead to distorted sound, reduced volume, and ultimately, headphone malfunction. A clean and well-maintained connection ensures optimal performance and extends the lifespan of your devices.Different headphone jack types require specific cleaning methods to avoid damage. Understanding these methods is vital for effective cleaning and preventing further issues.
Improper cleaning can lead to irreversible damage, so following the detailed steps Artikeld below is essential.
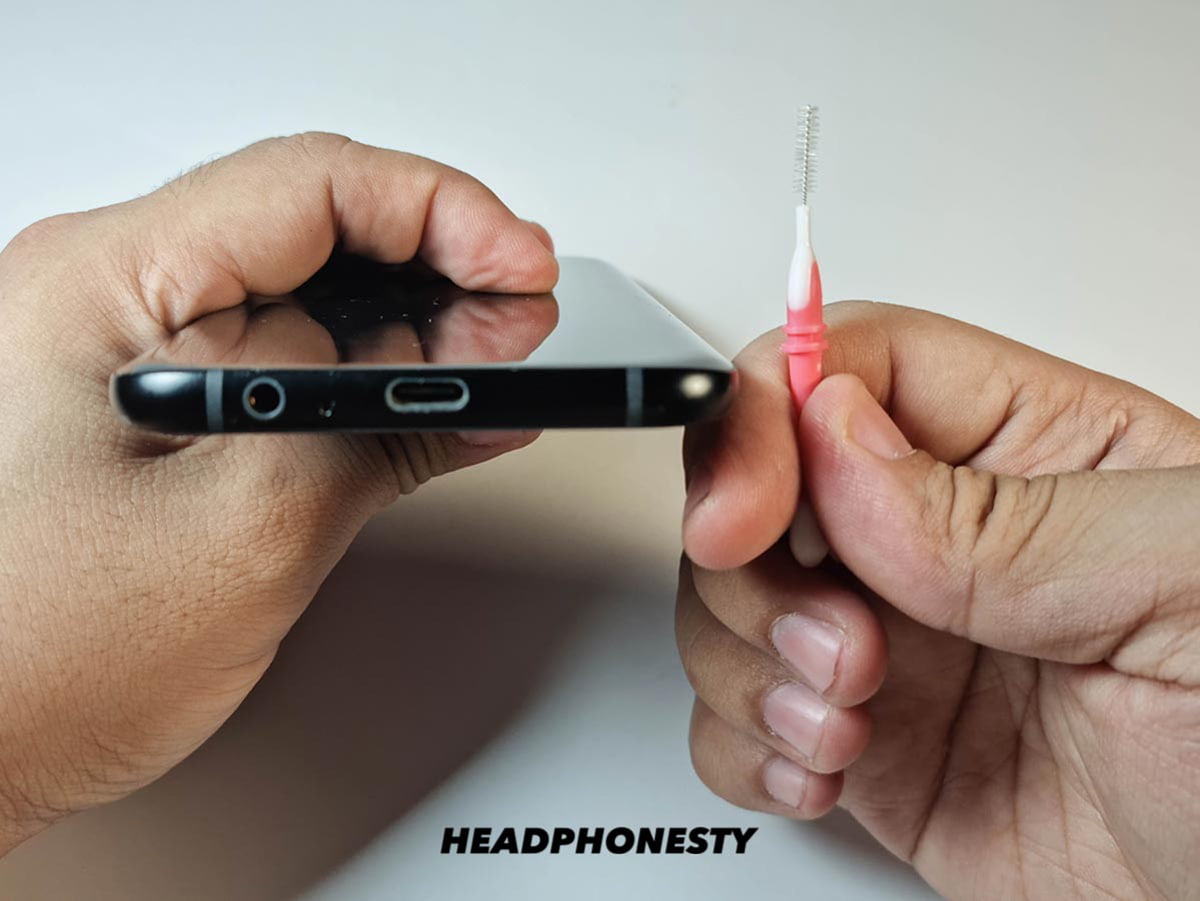
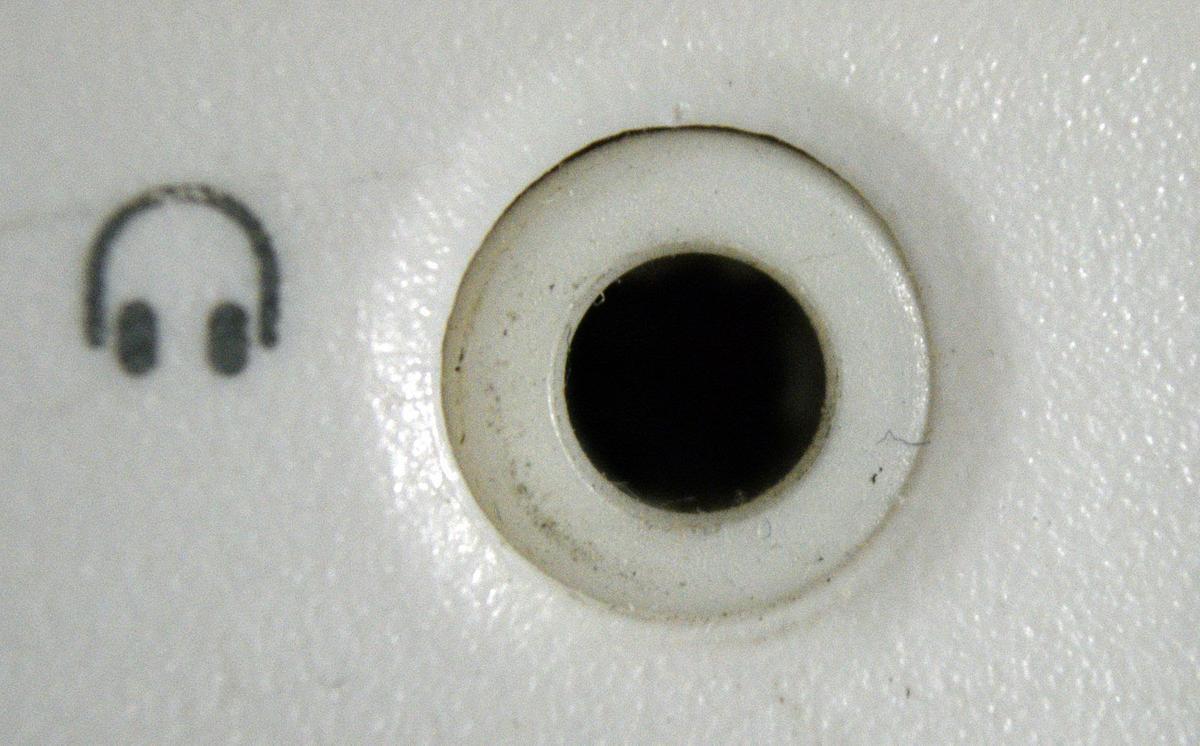
3.5mm Jack Cleaning
Cleaning a 3.5mm jack involves carefully removing accumulated debris and ensuring a secure connection. Begin by using a soft-bristled brush to dislodge any visible dust, dirt, or lint. Next, use a cotton swab dipped in a small amount of isopropyl alcohol (70% or higher) to gently clean the inside of the jack. Avoid excessive pressure to prevent scratching or damage to the internal components.
Finally, dry the area thoroughly with a lint-free cloth to prevent moisture buildup.
USB-C Port Cleaning, How to clean headphone jacks and ports thoroughly
USB-C ports are susceptible to buildup of dust, debris, and residue, potentially hindering optimal data transfer and charging. Start by using a compressed air canister to remove loose dust and particles. For stubborn debris, use a cotton swab moistened with a small amount of isopropyl alcohol (70% or higher) to gently clean the port’s interior. Avoid applying excessive pressure or force.
Finish by carefully drying the area with a lint-free cloth to eliminate any residual moisture.
Lightning Port Cleaning
Lightning ports, frequently used for charging and data transfer, can accumulate dust and particles, potentially hindering functionality. First, use a compressed air canister to remove loose dust and particles from the port’s opening. Then, employ a soft-bristled brush to remove any visible debris. For stubborn residue, use a cotton swab dipped in a tiny amount of isopropyl alcohol (70% or higher) to gently clean the port’s interior.
Avoid applying excessive pressure or force. Finally, dry the area thoroughly with a lint-free cloth to ensure complete dryness.
Comparison Table of Cleaning Procedures
| Jack Type | Step 1 | Step 2 | Step 3 |
|---|---|---|---|
| 3.5mm | Use a soft-bristled brush to remove visible debris. | Gently clean the inside with a cotton swab dipped in isopropyl alcohol. | Dry thoroughly with a lint-free cloth. |
| USB-C | Use compressed air to remove loose dust and particles. | Clean the interior with a cotton swab dipped in isopropyl alcohol (70% or higher). | Dry with a lint-free cloth. |
| Lightning | Use compressed air to remove loose dust and particles. | Use a soft-bristled brush to remove visible debris. | Clean with a cotton swab dipped in a small amount of isopropyl alcohol and dry with a lint-free cloth. |
Troubleshooting and Prevention
Maintaining headphone jacks and ports requires proactive measures to prevent future issues. Proper cleaning and preventative maintenance are crucial for ensuring the longevity and reliable performance of these components. Addressing potential problems early can save you from costly repairs or replacements down the road.A well-maintained headphone jack and port are less susceptible to common problems, allowing for consistent audio output and preventing frustration with intermittent connectivity.
By understanding the causes of these issues and implementing preventive techniques, you can ensure your devices remain functional and enjoyable for years to come.
Common Headphone Jack and Port Issues
Several factors can contribute to problems with headphone jacks and ports. These issues often manifest as intermittent connectivity, muffled audio, or complete loss of sound. Understanding the root causes is key to effective prevention and troubleshooting.
- Intermittent Connectivity: This is a frequent complaint, characterized by the audio connection sporadically dropping or the headphones failing to connect consistently. This is often caused by debris or dirt buildup within the jack or port, preventing a proper electrical connection. A simple cleaning can often resolve this issue.
- Muffled Audio: A muffled or distorted sound quality indicates potential problems with the connection. This can be due to a poor electrical connection, as a result of accumulated dirt or corrosion, or a physical obstruction. Cleaning the port can frequently resolve this.
- Complete Loss of Sound: A complete absence of sound suggests a more serious problem. This could result from a damaged or bent connector, corrosion, or more substantial physical damage. In these cases, professional repair or replacement may be necessary.
Solutions for Preventing Future Damage
Proactive measures can significantly reduce the likelihood of encountering headphone jack and port problems. Implementing these strategies ensures the long-term health and performance of your devices.
- Regular Cleaning: Regular cleaning is essential for preventing dirt and debris buildup. The recommended cleaning procedures detailed in the previous sections can help maintain the cleanliness and integrity of the jack and port. Regular cleaning sessions, at least monthly, are highly recommended to prevent the buildup of grime and dust.
- Avoid Harsh Chemicals: Refrain from using abrasive or corrosive cleaning agents on headphone jacks and ports. These substances can damage the delicate components and potentially cause irreversible harm. Using specialized cleaning tools, as discussed in the previous sections, is highly recommended.
- Gentle Handling: When handling headphones, ensure a gentle approach. Avoid excessive force, which can lead to bending or damage of the connectors or port. This is crucial to prevent future damage.
- Protective Measures: Employing protective measures, such as storing headphones in their cases when not in use, can safeguard the delicate connectors and prevent accidental damage from external factors.
Causes of Headphone Jack and Port Problems
Several factors contribute to issues with headphone jacks and ports. Addressing these causes is essential to preventing future problems.
- Dirt and Debris Buildup: Accumulation of dust, lint, and other debris can obstruct the connection points, leading to intermittent connectivity or muffled audio. Regular cleaning prevents this buildup and keeps the connection points clean and functional.
- Corrosion: Exposure to moisture or liquids can cause corrosion on the metal components of the jack and port. This corrosion weakens the connection, leading to issues like intermittent connectivity or complete loss of sound. Careful handling and protection from moisture are vital.
- Physical Damage: Physical damage to the jack or port, such as bending or misalignment, can impair the connection and cause issues with audio output. Gentle handling and proper storage are crucial to avoid this damage.
Maintaining Headphone Jacks and Ports for Longevity
Maintaining the longevity of headphone jacks and ports requires a proactive approach. Consistent care and attention can significantly extend their lifespan.
- Regular Inspections: Conduct regular visual inspections of the jack and port to detect any signs of damage, corrosion, or debris buildup. Early detection allows for timely intervention and prevents potential issues.
- Proper Storage: Store headphones and devices carefully to protect them from damage. Use cases or protective covers to prevent accidental damage from impacts or drops. This is crucial for the longevity of the headphone jack and port.
- Avoiding Extreme Temperatures: Exposure to extreme temperatures can affect the integrity of the headphone jack and port. Keep devices in moderate temperature environments to maintain their optimal functionality.
Examples and Case Studies
Understanding the potential damage from improper cleaning and the successful outcomes of meticulous cleaning methods is crucial for effective headphone jack and port maintenance. These examples highlight the importance of safe procedures and the diverse nature of debris encountered. Applying the right techniques can save your devices from costly repairs and extend their lifespan.
Scenario Demonstrating Proper Cleaning
A user, noticing dust accumulation in their laptop’s headphone jack, decides to clean it. They gather a can of compressed air, a lint-free cloth, and isopropyl alcohol (70% solution). Using the compressed air, they gently blow away loose dust and debris. Subsequently, they use the lint-free cloth, moistened with the isopropyl alcohol, to wipe away any remaining residue.
They carefully avoid excessive pressure to prevent damage to the internal components. This methodical approach effectively cleans the jack without causing any harm.
Examples of Damaged Headphone Jacks Due to Improper Cleaning
Improper cleaning methods can lead to various issues. For instance, using abrasive materials like steel wool or harsh chemicals can scratch or damage the internal contacts of the headphone jack. Inserting sharp objects, like a needle, to remove debris may puncture or pierce the jack’s components. Excessive force when cleaning with compressed air can dislodge or bend internal wires.
In some cases, using too much isopropyl alcohol can lead to corrosion or damage to the jack’s plastic components.
Real-World Examples of Successful Cleaning Methods
Many users have successfully cleaned their headphone jacks using the compressed air and lint-free cloth method, achieving a clean, functional port. Similarly, using a soft-bristled brush with compressed air is a suitable alternative for removing debris that resists being blown away. Some individuals have reported restoring functionality to their devices after carefully cleaning the headphone jacks with the recommended procedures.
Different Types of Debris Commonly Found in Headphone Jacks and Ports
Headphone jacks and ports accumulate various types of debris. Loose dust particles, hair, and lint are common. Crumbs and small food particles can also be found. Sticky residues from earwax or other substances can also adhere to the jack. Sometimes, a build-up of dried fluids or pastes can be found.
These types of debris vary in their composition and require different cleaning approaches.
Different Cleaning Techniques with Visual Aids
(Note: Visual aids cannot be provided here. However, a demonstration using a disassembled headphone jack model, showing the use of compressed air and a soft brush to remove debris, can effectively illustrate the process. A magnified view of debris, highlighting the different types mentioned above, would also be beneficial.)The compressed air is used to dislodge the larger particles, while the soft-bristled brush carefully removes stubborn debris without scratching the contacts.
Moisten a lint-free cloth with isopropyl alcohol to wipe away any remaining residue. This visual representation would demonstrate the importance of gentle, controlled movements throughout the process.
Summary: How To Clean Headphone Jacks And Ports Thoroughly
In conclusion, maintaining the cleanliness of your headphone jacks and ports is a simple yet essential practice that significantly impacts the functionality and longevity of your audio equipment. By following the detailed steps Artikeld in this guide, you can confidently and effectively clean your headphone jacks and ports, ensuring a superior audio experience and extending the life of your devices.
Remember safety precautions and choose appropriate tools for your specific connector type. With proper care, you can enjoy clear, crisp audio for years to come.
Commonly Asked Questions
What kind of cleaning solution should I use?
Use a mild, isopropyl alcohol-based cleaning solution. Avoid harsh chemicals or abrasive materials.
How often should I clean my headphone jacks and ports?
Clean your jacks and ports at least once a month, or more frequently if you use your headphones or devices extensively.
What if I accidentally damage my headphone jack or port during cleaning?
Seek professional help immediately. Avoid further attempts at cleaning if you suspect damage. The damage may not be immediately apparent. Don’t risk further harm.
Can I use a cotton swab to clean my headphone jack?
While cotton swabs might seem like a good option, they can potentially scratch the delicate components of the jack or port. Consider using a soft-bristled brush instead.